Drawing and chronic wrist pains as an artist, How I live with it.

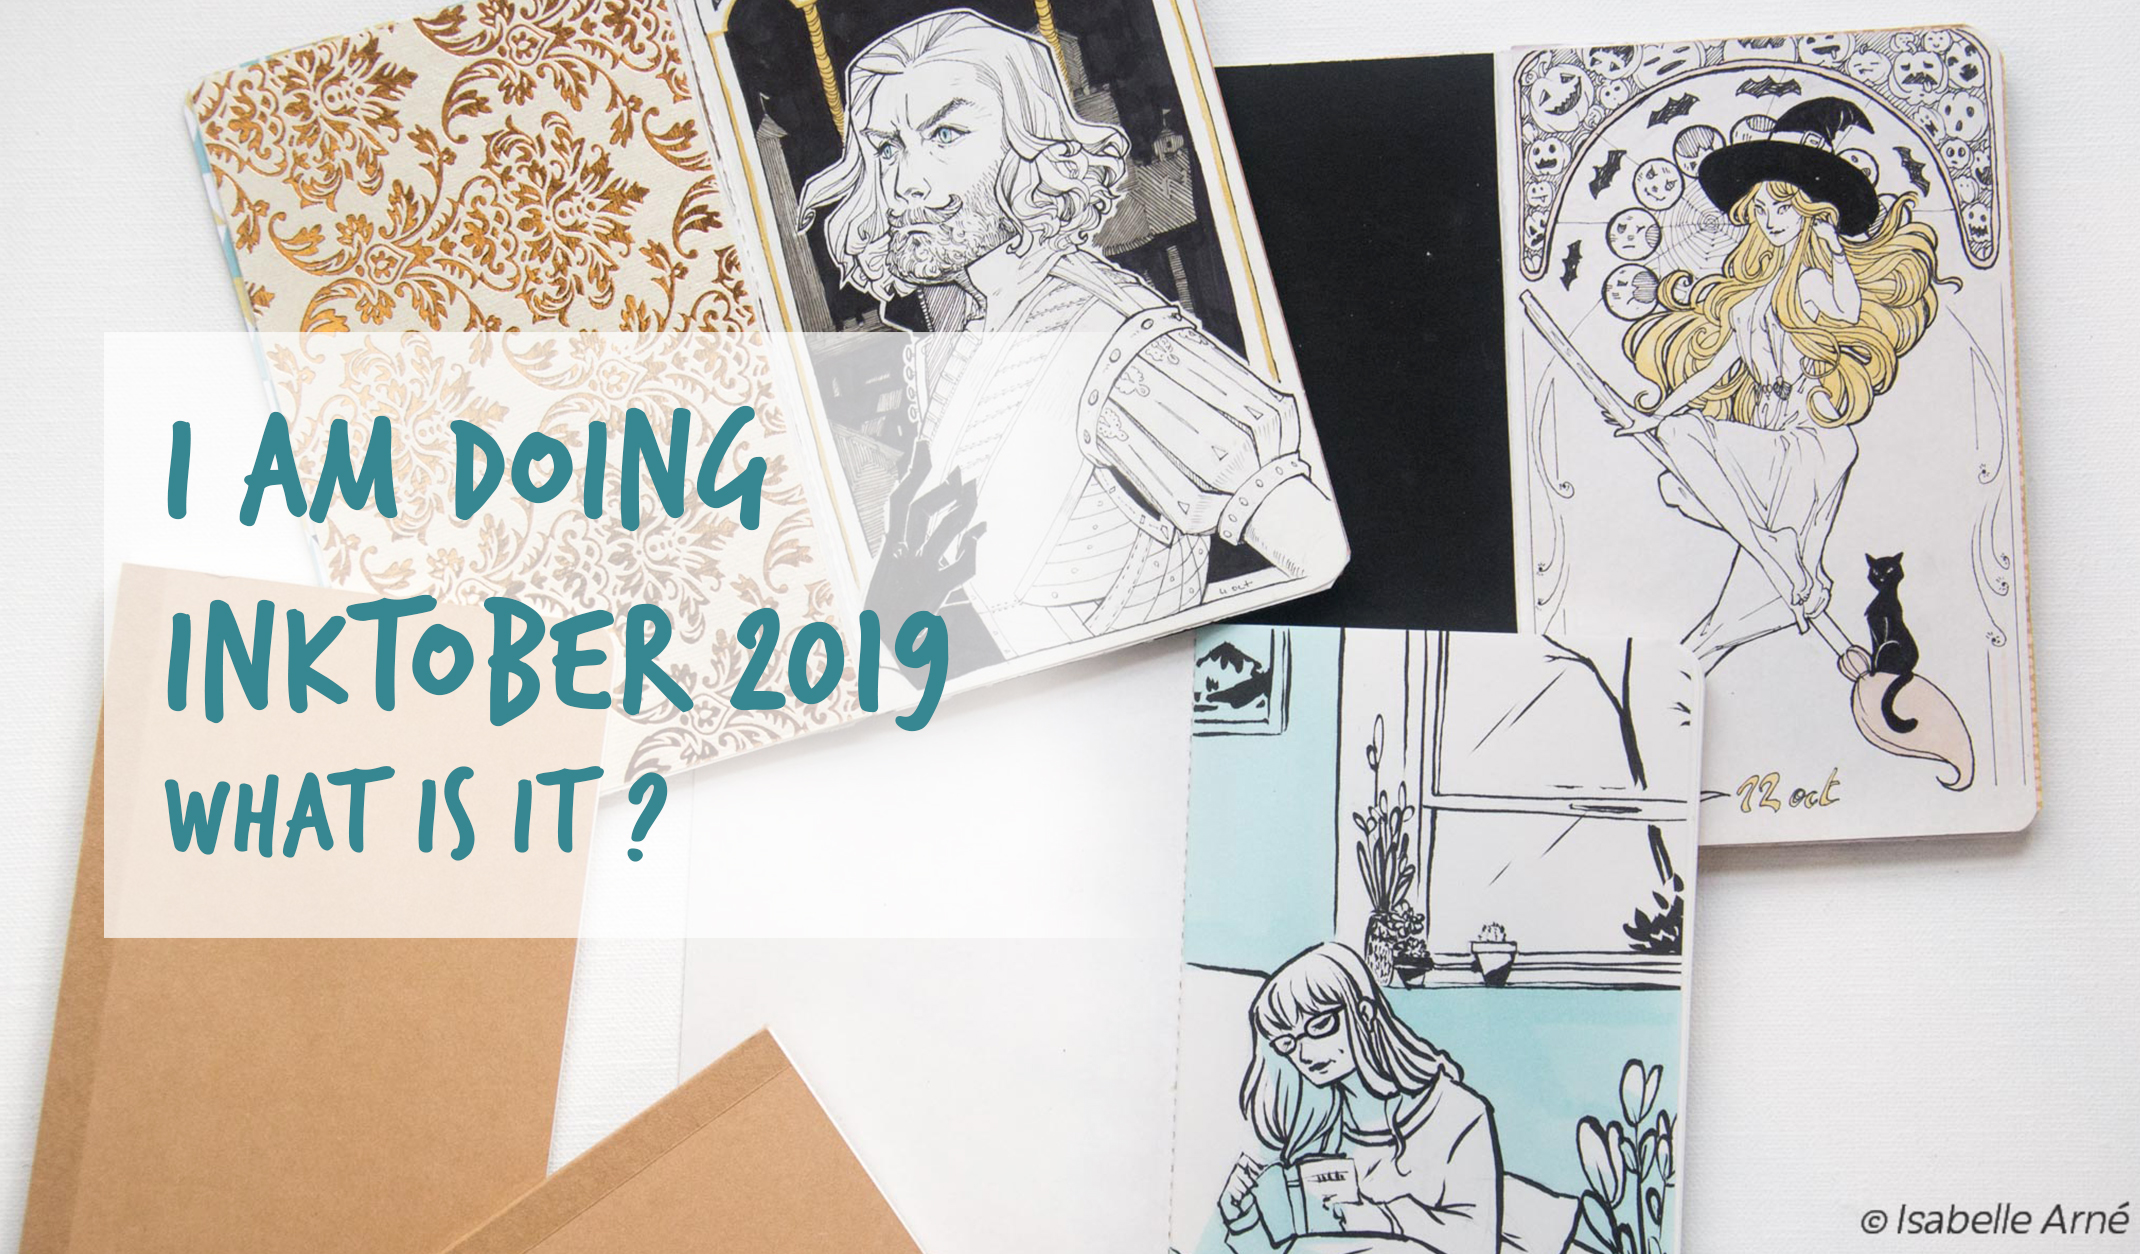
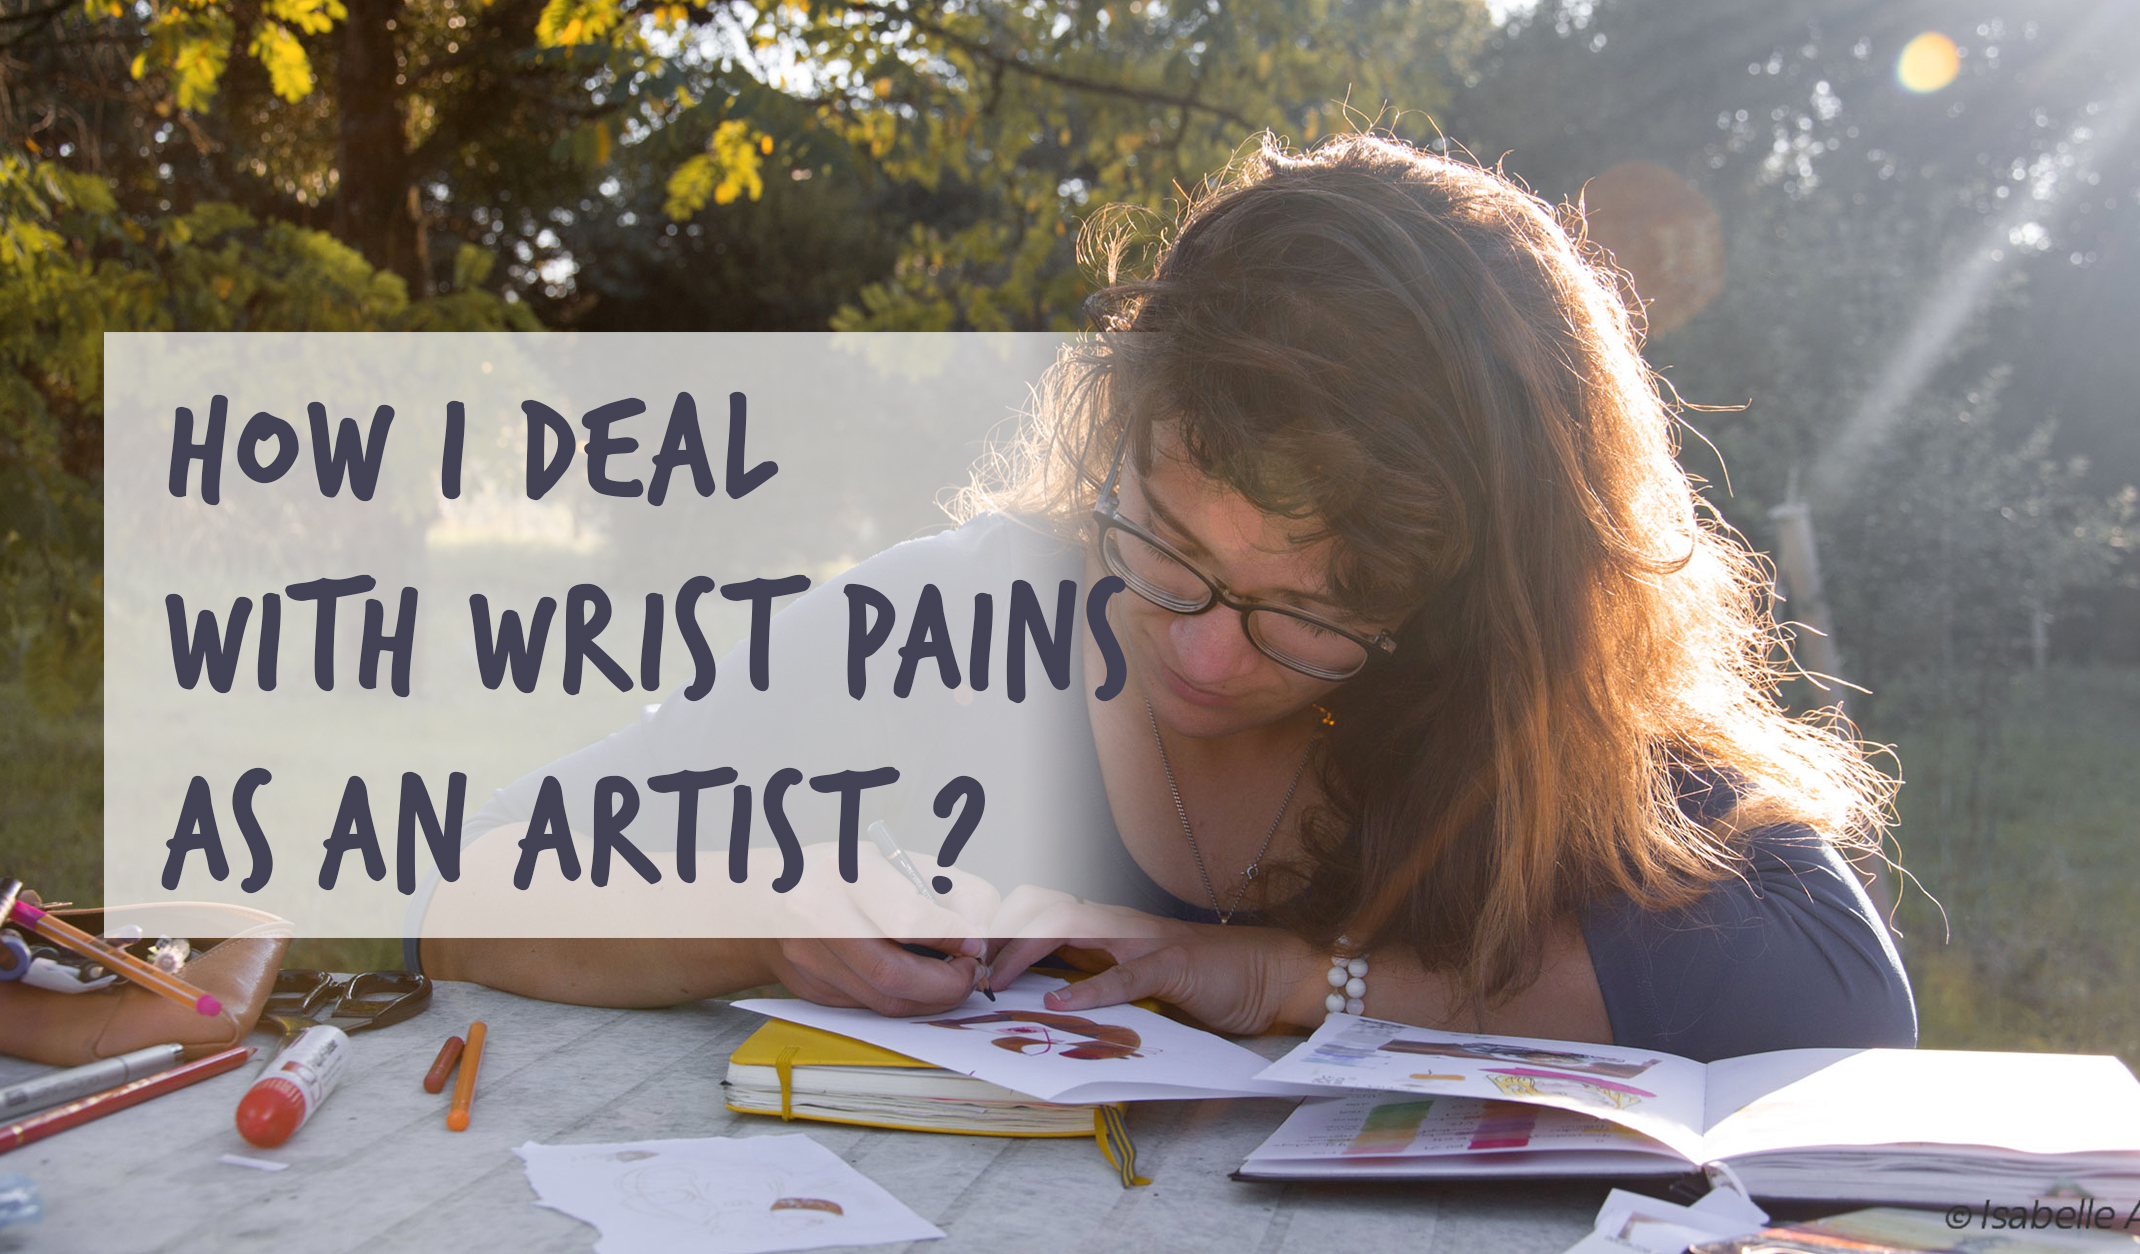
Bonjour, today I want to talk to you about a rather serious subject: chronic wrist pains as an artist. As you may know from my previous posts I am doing Inktober this year. Which means I am drawing a lot everyday, hours after hours.

Isn’t it your work all about drawing ? Well the work of a freelance illustrator includes a lot of things like answering to mails, doing quotes, doing finances stuffs and advertising as well as drawing.

And Inktober is rather drawing intensive and I have a history of having wrist pain. To be true I hurt all the time but I learned how to manage it so I can work without being too bothered.

having wrist pains as an artist

How did the wrist pain started ?

You will allow me a bit of story time today.

I have always drawn a lot, even when I wasn’t allowed to in high school. Then when I went to art school, the amount of drawing involved in my day to day life increase, and increased and increased. At such a level that in 4th year (out of five) I started feeling an acute pains in my right wrist. The pain didn’t stop there and went to my elbow and after that to my shoulders. It was terrible.

Some times I couldn’t even close or open my hand correctly.

The summer break arrived and I was rested and ready for the 5th and last year of my school years. The last year involved making a short movie. Animation require of course a lot of drawings, 13 drawing per second, just imagine the amount of work, you need to add to that the concepts, the landscapes and all kind of artworks.

My wrist started hurting earlier in the year this time.

I wend to see various specialists, physiotherapists, osteopath and even an acupuncturist. The acupuncturist ended up really helping me in a way maybe more than the other because he managed to relax me.

Because I wasn’t only hurt I was also depressed, would I hurt forever on when I would be drawing? Could I keep drawing as a profession? Could my arm be cured?

It was scary !

I finished my year, I finished my project in the utmost pain but I finished.

Oh if you’re curious I’m putting it here, it’s kind of old but I guess it’s worth the watch :

You are going to ask me where is the silver lining here? It’s getting pretty depressing. And yes it was, I was depressed for a while. I stopped drawing for a while too.

After a while I came to the conclusion that :

  1. I needed to stop doing animated film
  2. I had to work differently
  3. I had to find a new life hygiene

All the three answers where not easy to accept.

Because work can be found more easily in the animation industry than as a starting freelance artist. Animation is hard work but it’s well paid. I found very hard to reduce my workflow because I’ve always been a workaholic. I never stop drawing if I am not stranded (but honestly I was). But I had not choice and I started my path.

Changing your life hygiene to live with the wrist pains.

What does that even mean?

What to do when you have wrist pains?

I discovered that at some point the pain never stop, I went and read articles about the cause, like this one it helped me understand .But in the en I managed it by… Be ready, it’s the big answer : doing sport !

The osteopath often told me, go swimming it’s the best way to muscle your shoulders. But it is not easy to have a good swimming pool around my home, and I never had the opportunity to do that. But I managed to find a routine that I want to explain to you:

1* Muscle your wrist ! Get it stronger

This is actually the best advice I ever got. It is basically this video here that helped me the most : See it here.

muscle study

And doing these exercises at least 3 times a week help strengthen my arm and my wrist really efficiently. It greatly reduced the heavy pains. And after a while of exercising my wrist the pains would be low enough for me to do art everyday.

2* Take breaks!

Yes don’t push yourself! This one was particularly hard, but I know now, that if one day I feel like my hand can’t make it, it’s ok, I can stop now. You don’t have to listen to the guilt. Then I will do something else, like writing a blog post (yes today I am totally hurting and I missed an Inktober day, but it doesn’t matter, health first and it allow me to share this story with you!). I won’t say it enough, just be nice to yourself.

3* Relax

Maybe this one is just for me, I’m a stressed one, and my pain also comes from the fact that I crisp my hand on my pencil. I am often tense. This tension is really bad and increase the workload on the hand.

How to relax ?

I’ll let you find your way, for me it’s to take walks, go biking, being in the nature is the most efficient way for me. I try to have a breather for 30 minutes at least every day. Talking to someone about my troubles, or just taking a deep breath.

relax to help wrist pains as an artist
A watercolor painting made during a weekend to “l’île de Ré”

Is being an artist possible with chronic wrist pains?

Yes of course! It is very possible, but always remember that health comes first. And there is a good reason for that, if you overwork yourself you will pay the price the next day, so it’s not really efficient in the end.

Have some tea!

Ok I hope I helped you in some way! I am of course no doctor and am just giving advice from my own experience.

Tell me in the comment if you are in a similar situation. Do you have wrist pains? How do you manage it?

How to I plan your time for inktober ?

Bonjour ! Inktober has been starting for almost a week already and I must say I’m quite confortable with my time at this point of the challenge. But it’s only the beginning, let me show you how I planned my time for Inktober drawing to finish the challenge.

More than just sharing my art from this week, I wanted to help you with what I do that I hope will help me finish Inktober in time and not stressed out.

Start by deciding what you will plan on drawing.

Before Inktober I have decided what I will be doing, or at least a good part of it. I know I will be drawing women, medieval women and some from pop culture. And I also know I will be trying to follow the prompt. But to be honest I find it harder and harder. It doesn’t matter, I’m still doing a drawing a day !

I have already talked about my theme in this post, go check it out.

plan your time for inktober
I’ve made and page in my bullet journal where I plan my time for Inktober

Sketch your Inktober in advance.

It is a very good idea to draw some of the sketches in advance. I have done few sketches even before October has started. Last week, when I had a bit of time after inking my illustration of the day I would spend it on the sketch of the next day.

inktober mathilde de toscane illustration
Three sketches for Inktober made in advance for Mathilde de Toscane

This should be visible in future illustrations. In that I mean that I’ve drawn some sketches for various days of Inktober. But in the more recent sketches I have done, I’ve decided stylise more my illustrations. I want to have more strong shapes and more defined look.

When it comes to finding your style, Inktober is actually pretty good for that. Since you will be doing a lot of illustrations in a short time.

princess monoke princesse inktober
See the strongly stylized shape in this Inktober from October 4th. It is a recent sketch.

Fix yourself a time everyday to draw.

If you plan on finishing Inktober to the end. The best is to create a habit. Try fining time every day to draw. The thing with inktober is that you doesn’t need to spend too much time on each drawing. For exemple I’ve decided to do A4 and A5 illustrations. It means that I would have less work on some days. And these days I will use it to do my sketches for the next day or the days I know I haven’t planned a sketch yet.

And to be honest, the other day I had more time for the challenge and I also did the Inktober for the next day ! It just mean I will be able to have one day off ! This day off is actually today, and I’m taking it to write in the blog, because I also much enjoy doing the blog, it’s a new habit I have now.

I hope these small tips will help you to plan your time for Inktober and finish the challenge. Don’t forget to rest, if you’re feeling tired one day it’s ok to either do a very minimal drawing or just skip a day.

Have a good Sunday and I’m leaving you with the Inktober illustration of the week :

If you want to see my inktober day after day I post it everyday on my instagram @isaarne.art but I will of course keep you updated next week on what I will have worked on.

Ok bye for now !

What theme for inktober 2019 ?

Bonjour !

Every year, Jake Parker gives a list of themes for Inktober. You can find the list of Inktober’s prompt here.

Why not use the main inktober theme ?

Of course it’s a good idea to use Jake’s Parker prompts, but they can been see has somewhat vague. I don’t think it’s a bad thing that it’s so vague, on the contrary, it’s a good way for you to create a unique Inktober challenge for yourself by mixing the prompts with your own theme.

And it’s exactly what I’m doing : I’m taking the prompts as much as can and mixing it up with my theme.

Ok I’ll stop making you wait and tell you about my theme right now :

Famous French Women from the middle ages.

sketchbook inktober theme
Research for my theme in my sketchbook.

I think it’s a good way for me to fulfill two wishes : draw a variety of women characters that my portfolio is lacking and also knowing history a little better. I will admit that my knowledge on the subject is very lacking.

To know a bit more the 10 women I have picked, and to choose who to pick, I’ve had to do a bit of research. The hardest part was of course to mix their history with the actual Inktober prompts. Not an easy theme.

Also you will probably wonder, 10 women doesn’t make 31 days ! And yes, my plan isn’t perfect. But hear me out.

To stay into my theme and to fill the month of Inktober with it as much as possible. I’ve decided to illustrate two or three scenes from these women’s lives. And if there is still blanks after that I’ll just do a bunch of fan art of women from movies, anime and comics that I love.

In the end I will still have a body of work featuring these women, and that’s what I am expecting. And I will also have created a few fan art for a future event that I will talk about after Inktober passes.

Fair don’t you think ?

Thank you for reading this article, to continue the story I’ve made a video about Inktober where I show the first sketches I made in preparation of the challenge.

Next week I’ll post an update of how Inktober is going, if you can’t wait it start tuesday on my instagram

How to train your inking skills and get ready for Inktober ?

Bonjour ! Let’s see how we can train our inking skills to be ready for inktober 2019 !

What ? Doing homework before Inktober ? What is that !

You probably reading this.

You will see, I just want to help you start Inktober in the best condition possible. And Getting in the best condition is knowing your tools before Inktober starts. So I invite you to do a few simple exercises to train your hand before Inktober. This way you will be able to do the best art possible. I will be doing these exercises too. It can help me get the best of my art.

These advises are if you want to take Inktober as a challenge to better yourself. Of course you can take Inktober as a fun and chill game, and it is absolutely fine too ! Everyone eperience Inktober differently. This year I have decided to take it as a challenge. I will create 31 great ink illustrations that I will be proud to show together.

First of all : this exercise is good for everyone who want to learn inking, learn to use a paintbrush but also to those who want to learn how to ink on the computer !

All tools are good to ink and let’s all improve our skills !

If you’ve missed it here is the article where I talk about what tool to use for inktober.

It’s time ! Grab your Inktober pens and tools and follow along :

1/ Train to draw lines with ink.

drawing lines with ink to train for inktober

The first exercise is to draw lines. Make two points and try to link them with your pen/brush . Go over this line 7 times and try to do the thinnest line possible.

NO RULERS ALLOWED ! It’s against the whole purpose of the exercise.

Tips : Breathe and don’t go too fast ! It’s all about being focused.

2/ Train to draw circles and Ellipses.

Now you have some lines, draw in-between your lines, circles and ellipses. See my exemple picture to see what I mean. Here too it requires a bit of focus. And we all know circles are one of the hardest thing to do by hand. Don’t get discouraged and always take your time.

Tips : Try doing your circle slightly above the paper, without touching it at first to test your movement. Then ink.

3/ Doing curves.

Now this inking exercise is much like the 1/ except instead of 2 points to make a line : place 3 or 4 points and link the points with your pen. It will create a curve. Then go over it 7 times to train your hand.

Tips : Try to look in advance with you eyes where your hand needs to go.

inking exercises to be better for inktober
How my inking training page looks like in the end.

4/ Playing with the weight of your tool for inking.

This exercise is only if you are using a tool that can be variable like a paint brush, a computer brush or a dip pen. So I’ll take the exemple of a paint brush. It is what I will be using to ink some of my artworks for Inktober.

The exercise change slightly for tools using weight. But the “1/Train to draw lines with ink” doesn’t change since you want to do the most homogeneous line possible. Meaning a line with the same thickness from beginning to end.

For the “2/Train to draw circles and Ellipses” try doing your circle like this : thin when you go up, thick when you go down.

learning how to use a brush pen with ink
“Thin when going up, Thick when going down” here goes the inking song.

Also you can add one exercise : between two lines do a series of waves, thin when you go up, thick when you go down. This exercise is also often used to train for calligraphy and is not so easy to master. But I know you can do it ! If I managed to do it, so do you !

This is no simple exercises but you will learn how to master your brush, dip pen or any tool of varying weight !

train your inking get ready for Inktober
This is how you train your inking skills and get ready for Inktober!

Why should I train at inking ?

What should you train your inking and get ready for Inktober ? To do better art of course ! Isn’t it all what Inktober is about? (and the fun too …)

Also because these exercises forces you to use your hand in a precise way. And to get used to go over your line (for exemple your sketch) in a more accurate way. If you often think you sketch is better than your inked drawing. These exercises are made for you !

inktober preparation sketch in the skethbook
A few inking sketches I did after the exercises.

Of course I’m far from mastering my tools perfectly ! But I am planning on doing these exercises during this last week so I can feel more confident about my lines. If you do these a lot you will create what is called “muscle memory”. It means that these movements will be carved into your hand’s muscle memory ( just like “I must not tell lie” in Harry’s hand in The order of the Phoenix but without the pain…). It will be easier and easier to ink with time.

These exercise actually doesn’t come from me. It’s part of a bigger lesson called “Dynamic Sketching ” by Peter Han. You can find the video of introduction here and it is over all very good advice to get better at drawing.

Thank you for reading this article !

I hope it helped you improve your inking and have a better confidence in yourself.

So are you ready for Inktober now ?! I’m not so… I’ll go training at inking some more !

What tools to use for inktober ?

Bonjour !

I have already decided what tools to use for Inktober ! There is often a big discussion on the internet when comes the time of Inktober, can I ink digitally ? Do I have to only use inks ? Can I use this or this tool ?

The answer is yes ! Of course you can !

For me the purpose of this challenge is to improve yourself. Yes at first it was about learning how to ink. But I think these days it is more about improving your art.

I think Jake Parker, the creator of the challenge tells it too, it’s all about learning to use your tools better and becoming better artists. So just do it with what you want to be better at !

For my part I like to use traditional tools during Inktober. In my previous years I always used traditional medias. Of course I do love paper more than anything. I love the computer as well but it’s not the same feeling and I will always go toward traditional tools first. It is something that has been true for the last few years.

inktober pen tool
There is so many pen types available to you.

Traditional media is my thing !

So what tools am I going to use for Inktober ?

I recently put back into order a set of Rotring pen and old Faber castell pens that my dad owned. My dad did a lot of technical drawing when he was younger and had a huge set of the famous rotring along with a few other brands. Rotrings are pens that are made for a lifetime.

These pens are obviously very good quality and even if it was not so easy to clean them up they are truely the best tools to do Inktober !

Before that I used Copic Multiliner, they are very very good cheaper counterparts to the Rotring. What I love about the Multiliners is that you can easily change any used parts of it to a new one. On the other hand, now that I have tried the Rotring, I feel sad at amount of disposable part that the copic make. Wouldn’t it be much better to have pen for life and not create more garbage ? I always wonder.

Another tool I want to train myself in using is a paintbrush. I still feel very stiff and not in control with a brush pen. About that I will show you in a next article how to get a better control of you pens, brush and any tools that you might want to use for Inktober. A little warming up if you like !

My choice of pen and brush for Inktober.

So my tools are for this Inktober :

  • A small Winsor and Newton series 1 brush
  • Rotring pens of varying size
  • Indian ink
  • watercolor
  • Canson Montval 300gr

The watercolor I will use my own watercolor, if you’ve read the article linked here, you know I make my own colors. I wish to use one or two for Inktober. I don’t want to add much color and stay to the black and white in general but I am not against a little dash of color.

home made watercolor, red lake, yellow ocre, medium yellow, cobalt turquoise

What will be your tooks for this year’s Inktober’s challenge ?

I am very curious about it 🙂

Thanks a lot for reading me! Have you noticed ? I’m getting serious about this blogging thing, it feels great !

I’m doing Inktober this year !

Bonjour !

Yes this year again I am doing the Inktober challenge! Like every year my fingers tickle at the idea of doing this awesome drawing challenge. I like a good push like this. It is always a good way to prove to yourself that yes, you can do it. And also to create a body of work that will be the memory of that period in your life.

I dearly value my art memories because they remind me of the artist I am at that time.

My participation to Inktober in 2015, 2016 and 2017 was in these sketchbooks !

What is Inktober ?

Some of you may know it but maybe not everyone, so let me tell you about this now unavoidable challenge on the internet art spheres:

Inktober is a yearly challenge that take place during the month of October. The goal is to do a drawing a day during October, which means making 31 drawing.

The initial challenge was to make these drawing in ink. Inktober being the compression of “Ink” and “October”.

ANYONE CAN DO INKTOBER,JUST PICK UP A PEN AND START DRAWING.

Jake Parker, Inktober.com

The challenge was originally created by an American artist called Jake Parker that wanted to improve his inking skills. And it’s really what the challenge is all about, getting better and improving our art skills.

Some of the drawing made during Inktober of the previous years.

It’s really what I want this year : I want to get better.

If you followed me a little on Instagram you might have already seen that during the summer I worked hard on my anatomy skills. I’m happy of the progress so far. So I feel like this year is kind of a fresh start for me, improved skill, new art, things are going to be good !

To spice up the challenge Jake Parker publish every year a prompt of theme for each day. Some decide on following these some don’t. This year I have decided to follow it as much as I can as long as it fit my own theme (I will not talk about my theme today but I swear I’m excited about it).

Last year I did my challenge with Linocut.

I loved it because I did learn a new skill but at the same it wasn’t really like being part of Inktober since I only did 5 illustrations.

Check my video from last year showing me carving one of the illustration.

The year before wasn’t so good for me, I had attempted to do a small artbook with my art from Inktober and have it funded on Kickstarter.

Of course it failed.

I see why now, my art was not good enough or mature enough. Long story short, I feel better with my art right now and even if I won’t start a new Kickstarter I’m ready to do great art and more than anything finish the challenge.

Are you doing Inktober as well?

Getting inspiration for drawing

Bonjour !

I almost never lacking inspiration, it’s not a big magic secret, I just always have subjects to illustrate.

Je ne manque quasiment jamais d’inspiration, il n’y a rien de magique là dedans, j’ai juste toujours des sujets à illustrer.

 It can be client work, with a clear brief everything comes easily to mind. But I also have more personal subjects like my comics, or short stories projects or even my series of illustrations on people and gardens and plants. I just found that my inspiration could easily come from what moved me. I love plants, I’ll draw a girl taking care of her plants, it’s soft, it’s nice and I love it.

Cela peut être une demande client, avec une description claire tout viens facilement à l’esprit. Mais j’ai aussi plusieurs sujets personnels, des histoires courtes où même ma série d’illustrations de personnes avec des plantes ou dans des jardins. Je me suis rendue compte que mon inspiration venait facilement des choses qui me touchent. J’adore les plantes, je dessinerai donc une fille qui s’occupe de ses plante, c’est doux, c’est jolie j’adore ça !

bartimaeus isabelle arne bartimeus

I also take inspiration from what I read.

I do love to read books and it is such a great place to find inspiration. 

I recently finished reading the Bartimaeus trilogy, three books in a magical setting with charismatic characters and highly interesting relationship between them.

Je prends aussi mon inspiration de ce que je lis.

J’adore lire, les livres sont un très bon endroit pour trouver l’inspiration.

J‘ai récemment finit de lire la trilogie de Bartiméus, trois livres dans un univers magic avec des personnages charismatiques et des relations entre eux des plus intéressantes.

bartimaeus isabelle arne bartimeus

Bartimaeus’s Books are set in a modern London but Sorcerers are the master of all living things, they have Djinns answering to them as slaves and humans without power that are just as oppressed.

La trilogie de Bartiméus prends place dans une Londre moderne où les Magiciens sont les maître de tout ce qui vit, ils ont des djinns qui répondent à leurs ordres comme comme des esclave et les humains non magiques sont tout aussi opprimés.

The situation isn’t perfect…

La situation n’est pas parfaite…

The story turns around three characters, Nathaniel or John Mandrake, a young mage with ambition that would do everything to climb the social ladder.

Bartimaeus, his Djinn, that behind his funny jokes, marveling antic stories and dangerous power, has a good heart.

And Kitty Jones, a young rebel of the people that wants to free the non-magic people like her of the tyranny of the Sorcerers. 

L’histoire tourne autour de trois personnages, Nathaniel ou John Mandrake, un jeune magicien ambitieux prêt à tout pour monter à l’échelle sociale.

Bartiméus, son djinn, qui derrière ces blagues, ses merveilleuses histoires antiques et ses dangereux pouvoirs, possède un bon cœur.

Et Kitty Jones, une jeune rebelle du peuple qui veux libérés les gens non magique comme elle de la tyrannie des magiciens.

bartimaeus isabelle arne bartimeus

I dearly enjoyed these books and it fuelled my inspiration to create the illustrations I’ve displayed in this article.

J’ai adoré ces livres et ils ont nourris mon inspiration pour créer les illustration que j’ai mis dans cet article.

bartimaeus isabelle arne bartimeus

So if you’re feeling like nothing comes to mind, I dearly advise you to pick up a book, watch a movie, read a comic and get inspired. I do believe that inspiration does not come from the sky but rather is fed by what you have around you.

Alors si vous n’arrive pas a trouver quelque chose a dessiner, je vous conseille de prendre un livre, regarder un film, lire une BD et de trouver l’inspiration. Je ne pense pas que l’inspiration tombe du ciel mais plutôt qu’elle est nourrie par ce que vous avez autour de vous !

What have you been reading recently ? Or do you know a good book because I just finished mine …

Qu’est ce que vous avez lus récemment ? Où connaissez-vous un bon livre parce que je viens juste de finir le miens …

How to make your watercolor at home ?

Today I will show you how to make watercolor, everything home made ! I’ve started doing it not so long ago so don’t take my word for granted but you can still try it out for yourself. I’ve made the step and you can find some of my own watercolors at the end of the article.

Because yes, making home made watercolor is fun !

I’ve made so far 5 different colors, two browns, a peach, a blue and a black. All the colors have a very different mix of pigment and binder and I’d love to talk to you about how I made the 6th watercolor : medium yellow.

home made watercolor test
Some test of my home made watercolors in my sketchbook.

How is watercolor made ?

Watercolor basically made of a binder and pigments. 

Pigments are based from rocks, oxyde or organic elements. In the case of the yellow pigment I used it is I believe based on an oxide made from leads. All the pigments I got were given to me a long time ago and often I’m not too sure of their origin and or what it is based of. I’m a little sad about it but, it allows me to experiment at a lower cost. I’m not going to complain about it. 

The binder is what will make the paint stick together and be usable as a paint. The recipe varies for each type of paints. For oil paints, the pigments are mixed with linseed oil. For watercolor the binder used is Gum Arabic because it can be reactivated by water. 

I really love the color and the smell of natural Gum Arabic. It’s so pretty, it’s made from the resin of a special type of acacia tree found especially in Africa. I kinda hoped I could have made it from the acacia trees in the garden but it’s not the same kind at all !

gum arabic for home made watercolor
Raw gum arabic to make watercolor binder.

What to use to make watercolor ?

  • Gum Arabic
  • Vegetal glycerine
  • Distilled water
  • Honey
  • Clove essential oil
  • Glass plate
  • Glass muller
  • Palette knives
  • Spray bottle
  • Empty and clean syringes
  • Empty half pans
  • A scale 
  • Paper, brush and water to test out the paint
tools for home made watercolor
The tools and ingredients needed for home made watercolor.

My watercolor recipe :

For this medium yellow watercolor that I’m going to make, I prepared ahead the following binder

  • 8g of gum arabic
  • 16g of distilled water 
  • 8g of glycerine
  • 1g of honey 
  • 3 drops of clove essential oil

First take the gum arabic and put it to dissolve in distilled water. You can find an easy way to make distilled water here. I use big chunks of resin so it takes around a day to dissolve in the water. Gum arabic powder exist, and might be faster to dissolve. 

Then once everything is dissolved add all the other ingredients and mix well

You can replace clove essential oil with thyme essential oil or vinegar. Its whatever your nose like best, this is used to preserve your paint. 

The binder I just prepared is little more than what I am going to use for the paint, but it’s ok the binder can be put aside a week in the fridge. You can try another color later !

how to make watercolor paint at home
Adding the pigments and the binder.

Adding the pigments:

10g pigments + 9g binder

I find this ratio worked really well. It’s one of my most successful watercolor recipe. But as you will notice if you try various pigments, each pigment is different and your home made watercolor will need each time adjustments. Each pigment will actually need its own recipe and ratio in ingredients !

how to make watercolor paint at home
Mulling the binder and the pigment into watercolor paint.

Mulling the pigments into watercolor paint.

The mulling is about making the pigments and the binder into one smooth and homogeneous paste. You just have to find a quiet place.

Put your pigment and binder on a glass plate and make circular movements with your glass muller for a long time. Keep the paste moist with the spray bottle filled with distilled water as you go. It’s easier to work with a moist watercolor paste.

I tend to grind the pigments for around 1h.

I check my paint on a piece of watercolor paper from time to time to see how fine the paint is becoming. It can start to be fine around 30 minutes of mulling but I like spending the extra time to have a very very fine watercolor. 

For my first home made watercolor paint I didn’t spend enough time on the mulling and I am dearly regretting it now.

how to make watercolor paint at home
Filling the half pans with my home made watercolor

Putting the paint into pans.

Now your paint is done. You’ve checked your paint, you love it on paper, you can take your pans or half pans and fill them with the paint !

I usually let it dry a bit before using it. I have a palette full of my home made watercolor.

Watch the video that shows the whole process for this paint :

And paint !

I’ve already tested the paints during a plein air session. The yellow is quite wonderful and make greats shades of green with the blue I had made previously. I’m surely going to use it more in the future for my art.

plein air watercolor isabelle arne homemade paints
Plein air painting using the watercolor I just made (medium yellow included !)
Another watercolor illustration painted with the home made colors.

Thank you for reading I hope this article was interesting to you.

I am often doing watercolors for myself. I am selling the rest of my batch since I’m always doing too much. Check out below if there is any available:

[etsy-shop shop_name=”Isabellearne” section_id=”29477944″]

note: if nothing appears it means that there is no paints available 🙂

Welcome !

Bonjour ! And welcome to my blog and website, I’ve had some recent difficulties with my website that has forced me to start it again ! But I am here now and for good.

I’ve prepared a little FAQ to present myself :

Bonjour ! Et bienvenue sur mon site et blog, pour commencer je vous conseille de suivre les textes en bleu qui serons en Français ! J’ai eu quelques difficultés avec mon précédent site mais je suis de retour pour de bon.

Voici une petite séries de questions pour me présenter :

So who am I ?

I’m Isabelle Arné and I’m a French freelance illustrator, I was born in 1990, I love to draw with watercolors, gouaches and digital medias. I enjoy nature and hikes, outdoor painting and cosy evenings with a nice home cooked meal.

Qui suis-je ?

Je suis Isabelle Arné, une illustratrice indépendante, je suis née en 1990, j’aime dessiner a l’aquarelle, avec des gouaches et aussi numériquement. J’aime les balades en montagne, les peintures en extérieur et les soirées tranquilles avec un bon repas fait maison.

What is a Freelance illustrator ?

As a freelance illustrator I find clients, or get requested to work on projects such as picture books, books cover, various illustrations jobs and even comics ! Being freelance means I work by myself at home with my own schedule, and that can be very nice. But being freelance also means I have to pay my own taxes and do the compatibility myself. I can rely only on myself to get work and do it on time, in sickness and in health.

Qu’est-ce qu’un illustrateur indépendant ?

En tant qu’illustrateur indépendant je cherches des clients, ou on me contacte pour des projets tel que des livres pour enfant, des couvertures de livres et des commandes d’illustrations variées, même parfois des BD ! Etre indépendante veux dire que je travaille depuis chez moi avec mes propres horaires, ça peut être très agréable. Mais être indépendant veux aussi dire que je m’occupe seule de mes taxes, de ma paperasse et que je travaille dans la santé comme la maladie !

Is it a full-time job ?

Yes it is ! Monday through Saturday ! Even though the week officially ends on Friday night I often work a bit on Saturday to catch up with the week or if there is extra work or a tight schedule. I also have recently taken on a side job as an art teacher, it gives me the opportunity to get out of my office and meet a lot of new minds. It’s a very interesting work and very stimulating as well.

Est-ce un boulot a plein temps ?

Oui ! Du lundi au samedi ! Même si officiellement la semaine se termine le vendredi soir il m’arrive de travailler le samedi pour rattraper un peu de temps perdu ou absorber le travail en période de fin de projets au planning serrés ! J’ai aussi récemment pris un poste d’enseignant en dessin qui me sort un peu de mon bureau. C’est aussi un boulot très intéressant et très stimulant.

So you do comics, are any published ?

I only do comic for commissions and for myself, I’m not really looking for a publisher at the time but I enjoy sharing the comic with readers on Tapastic and on Webtoon, two big web comic platforms. I also took part in various comic book collective with Tabulit comics and also Turbo Time Travel. I have a lot of comic projects that I will talk more in future. Right now you can read some of my short stories on Webtoon and Tapastic here :

READ SHORT STORIES ON TAPASTIC

And I also have a big ongoing series called Day dream that you can read here as well :

READ DAY DREAM ON TAPASTIC

It’ll all for free so enjoy ! And don’t forget to share around.

Tu fais des BD, en as-tu des publiées ?

Je fais seulement des BD pour des demandes ou pour moi, je ne cherche pas d’éditeur en ce moment et j’apprécie de partager mes BD sur des plateformes de BD en ligne comme Tapastic et Webtoon. J’ai aussi participé a des collectifs de BD avec Tabulit comics et Turbo Time Travel. J’ai beaucoup de projets dont je parlerai plus dans le futur. Pour l’instant vous pouvez lire mes histoire courtes ( en anglais seulement pour l’instant ici :

READ SHORT STORIES ON WEBTOON

J’ai aussi une série en cours, Day Dream que vous pouvez aller lire :

READ DAY DREAM ON WEBTOON

Tout est gratuit à la lecture ! N’hésitez pas a partager !

Where can we buy prints of your art ?

I have an Etsy shop, you can find some prints, a few original paintings and also some personalized commissions. Go have a look if you’d like :

Où peut-on acheter des reproductions ?

J’ai une boutique Etsy où vous pouvez trouver des impressions, quelques originaux et des commandes personnalisées. Allez faire un tour :

MY ETSY SHOP

Now that you know a little bit more about me, follow me and get notified ( not too often ) of the updates on what I do :

Maintenant que vous me conaissez un peu mieux, suivez moi et soyez notifié ( pas trop souvent ) de mes nouveaux projets .

[mc4wp_form id=”129″]

Or ask me more questions !

For more you can contact me at the contact page.

Ou pose moi plus de questions !

Pour plus tu peux me contacter sur ma page de contact.